Pattern Piece H
Oh Pattern Piece H, how crazy you are! For those of you who have The Dolls' Dressmaker by Venus Dodge, I just sent shivers up your spine.
And for those of you who don't have it, for Christ's sake, what are you waiting on?
Pattern piece H is the piece that makes a round yoke for dolls, which is delightfully historically accurate for Samantha and Nellie. You can get a few uses out of it for Julie and Ivy, and if you're slick, you can even make round neck tunics for your JLY dolls. Trufax! It's one of the easiest patterns in the book, but Miss Dodge doesn't give you clear directions on how to use it. That's cool, that's why they keep me around. Between the book directions and this, you should know the score. Once you do it, you'll see how totally easy this pattern is!
You'll need:
 Pattern pieces Hi, Hii and Hiii from The Doll's
Dressmaker -- and I'm not providing them. Go buy the book, it's on
Amazon.
Pattern pieces Hi, Hii and Hiii from The Doll's
Dressmaker -- and I'm not providing them. Go buy the book, it's on
Amazon.
Cloth -- Between 3/8 and 1/2 yard will do you.
Sewing supplies -- Needle, thread, machine, whatever
you use.
Optional but encouraged: Some form of elastic, like elastic thread or strip elastic, to finish the sleeves.
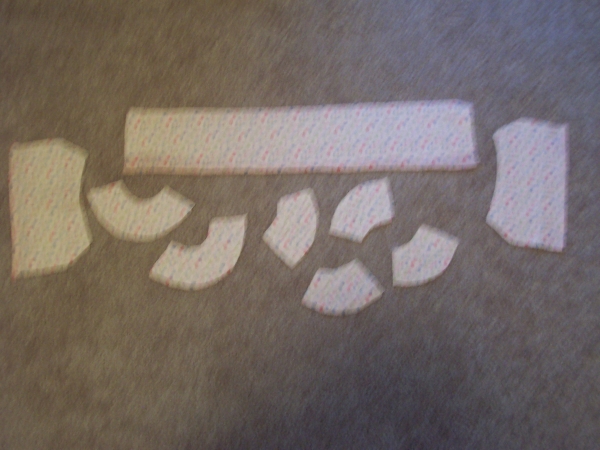
Start by cutting out your pieces: two of Hi and Hiii, then four of Hii. Also, cut a long rectangle of cloth. Consider that this is going to be the main 'skirt' of the outfit. Widthwise, it needs to be twice or three times the circumference of your doll's middle. Keep in mind that for thicker fabric, you'll use less cloth and for thinner, you'll use more cloth. Lengthwise, it needs to measure the length of your doll's chest to wherever you want it to fall (waist? knees?) plus about a half inch for the seam. Clear as mud?
We'll start with Hiii first, the sleeves. The flat edge is the hem of the sleeve. Dodge says that the sleeves aren't editable, but she's lying. You're welcome to make it into any of the fancy sleeves you see in the book, it just takes a little engineering. For Samantha and Nellie, the best and easiest way to finish the edge is to sew a casing in and run elastic through it. I'm being lazy and finishing the sleeve with an elastic thread, but I'm sewing for Ivy so I'm allowed to do that. You could also put the sleeve in a cuff to make a proper mutton leg. I would avoid hemming the sleeve like normal, because that will make it far too huge on your doll's arm.
The sleeves work out to be about 3/4 sleeves when finished normally. You can always shorten or lengthen them.
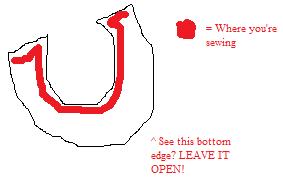
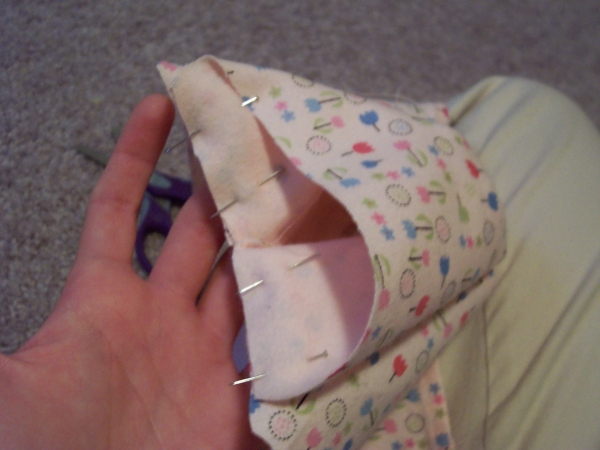
Look at the picture. See where I'm pointing, on the angled edge?
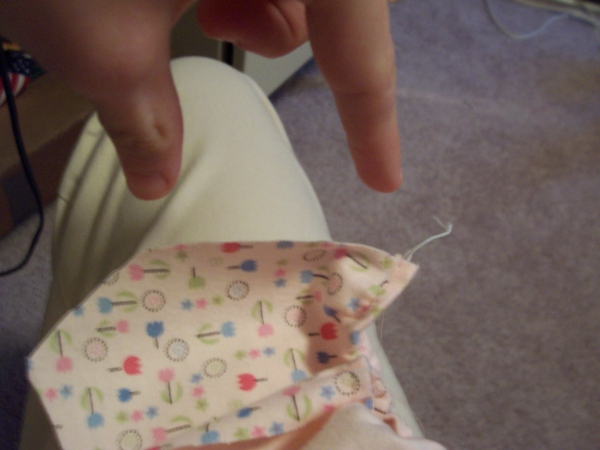
Pin the sleeves together with the hem at the bottom and sew up just the angled edge that I'm pointing at. You're leaving the back unfinished right now. You'll get this:
Do it for both sleeves, then set them aside.
Sew one Hii to each end of Hi. You'll wind up with a huge curve:
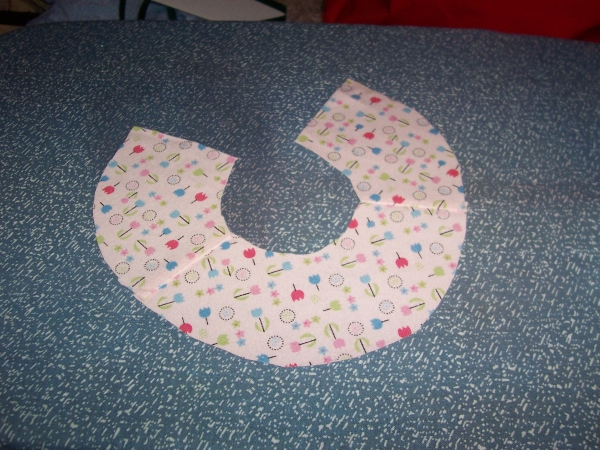
Fix all your Hiis and His up like this to get two big curves. Pin them together with right sides facing, then sew up the side edges and top edge. Confused? Of course you are! Look at my handy dandy MSPaint diagram here:
It's important to leave the bottom edge open! Turn it, press it, and make sure that you've got this:
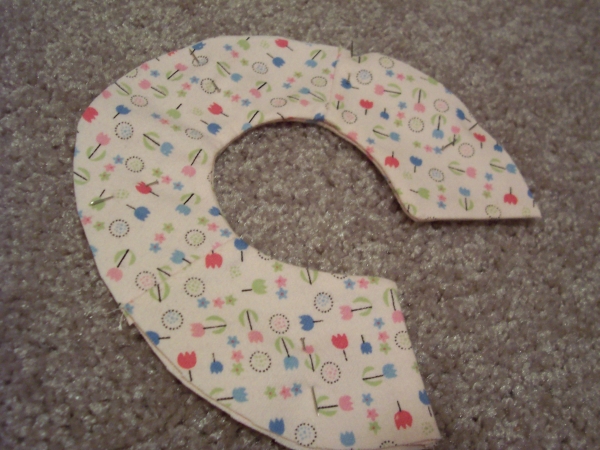
Set it aside.
Take your rectangle and hem up both of the short edges and one of the long edges.

Now, get some paper. You need to draw an isosceles triangle with two of the sides equal. Speficically, go back to Hiii. Two of your triangle sides need to equal the length of the sides of Hiii that are closest (or touching the hemmed edge. You know, those edges that we left unfinished a few minutes ago. It doesn't matter what the length of the third side is, but you probably want it close to equal to the other two sides.
Sounds complicated, right? Just draw a triangle with two sides the same length as the unfinished part of your sleeve.
If you're still lost, read the rest of the directions below, then see if you can get it by experimenting.
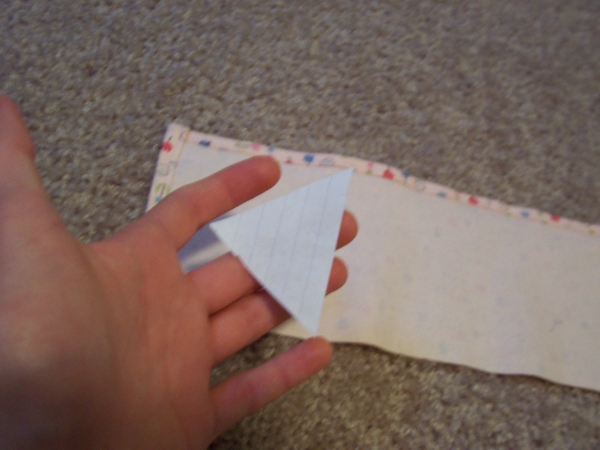
I call this my chip, and I don't know why. Call yours whatever you want.
Divide your cloth into quarters widthwise. You could do this by measuring, but if I were you, I'd be sick of math at this point and just fold it. Mark where one quarter from the left is on the unfinished edge, then mark where one quarter from the right is (one again, on the unfinished edge). Don't go fooling with the hemmed edge!
Pin the center of your chip on your marks, point side down.
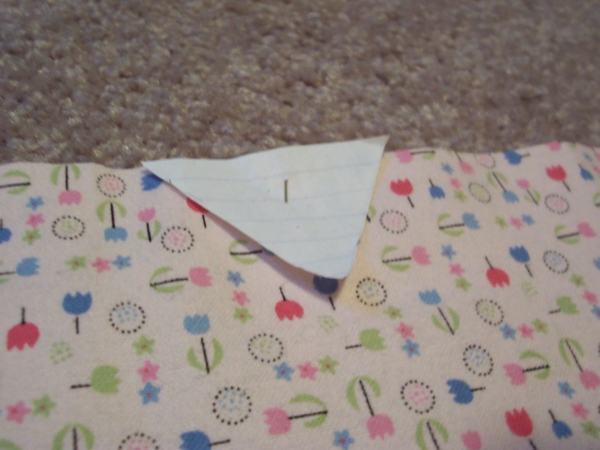
Now, using the chip as a pattern, cut two triangles into your rectangle.
This next part is confusing. I'd read the directions twice before doing anything.
Pick up one of your sleeves. Remember that little unfinished edge? Pin it into the triangle we just cut. The hem should be pointing away from the work, and you should be able to see a clear shoulder and arm pit at this point. The shoulder should be clear of any pins. Make sure the bottom seam of the sleeve lines up with the bottom of the triangle.
It should actually look like a sleeve at this point!
See how I've got my work stretched so that the triangle kind of makes a line? Do that, stitch it down, repeat for the other side.
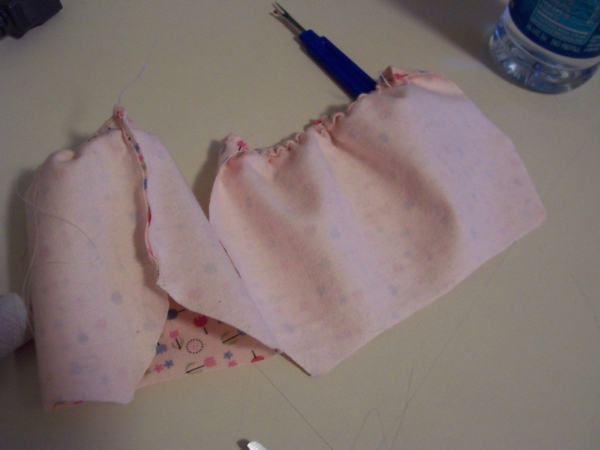
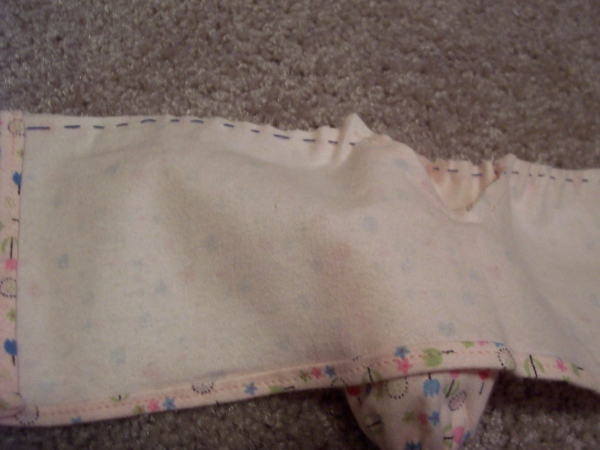
It should kind of look like a dress/shirt thing at this point.
It needs to be gathered. Gather along the unhemmed edge of the work, UP OVER THE SHOULDERS, and along to the other edge. If you gather down in the triangle, your doll won't be able to fit her arms in the sleeves!
Now, pick up your big curve/horseshoe piece. See the unfinished edge? Gather your gathered piece so that it is the same length as the unfinished edge. Now, pin the gathered edge to the unfinished edge of the curve, right sides together. Stitch it down, turn and press.
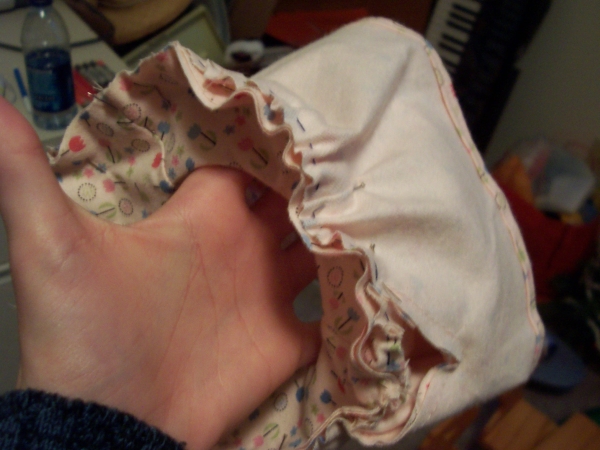
Rock out, you're done! Finish with velcro or snaps like you usually do.