Qipao
What in the world is a qipao? Read this first so you're not lost.
Ivy's Chinese dress is NOT an authentic Chinese dress. It's not even that close. My guess is that American Girl didn't make the real deal because the real thing would be hard for kids to get on and off a doll.
You're smarter then that, though. And also, you're a good seamstress. You can make the real deal, or at least a tiny fake representation of the real deal. Don't let your Ivy be emo any longer -- make her a real qipao today!
You'll need:
 A regular bodice pattern and a regular sleeve pattern
-- Something you know that works.
A regular bodice pattern and a regular sleeve pattern
-- Something you know that works.
Brocade -- Don't piddle around. Get a half yard
of REAL brocade. Don't get the screen printed stuff, either, turn it over
and make sure it's woven. We can fudge on every other material except this
one.
Lining -- It's the same stuff you line purses with.
In your craft store, it will actually be called lining.
Cord -- If we were going for the real authentic
Chinese experience, we'd get a very fine silk cord. However, you're sewing
for a doll, and your doll will not ignite if she doesn't have real silk.
I used a polyester cord because it's what I could find. Sometimes you can
find nice cord with the quilt bindings. If you really have to, you could
use yarn in a pinch, but it had better be high grade tightly woven sport
weight acrylic with a lot of sheen.
Optional but encouraged:
"Silk" -- Like I said, Ivy's not going to combust
if she doesn't have real silk. Feel free to use something silky like taffeta.
We're using this to make a trim around the qipao.
Ribbon -- Once again, for the trim.
Optional ONLY for an extra super dressy qipao:
Baby Rick rack -- Dear God, don't use regular rick
rack on a doll's outfit. That's tacky. If you wind up rick racking your dress,
use something shiny. Like I said, this is extra super fancy.
A note: if you're making this dress for Chinese New Year, DO NOT USE ANYTHING WHITE. No white ribbon, no white in your brocade, no white at all! In China, white is the color of death, and is hardcore bad luck to wear on Chinese New Year. Red is the most lucky, so go with that instead. However, if you're making this dress for another occasion, white it on up.
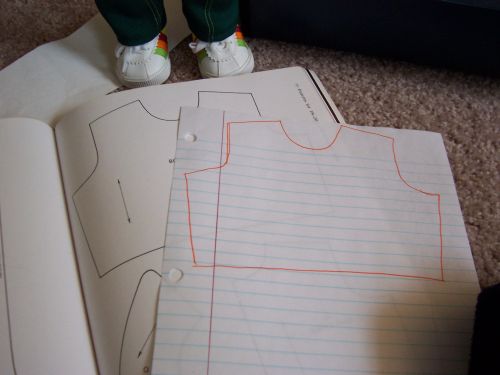
Trace your bodice pattern.
Now, extend it for as long as you want to make the outfit. You can make a shirt length one all the way to a floor length one. (Keep in mind that the longer it is, the fancier it is.) Notice that I've taped extra paper onto mine.
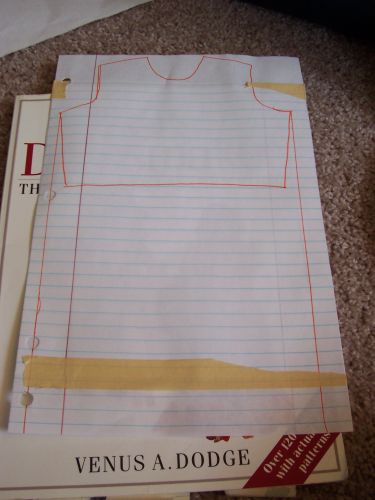
Draw a curve on the bottom. I measured out several dots and connected them ... I'm not sure my method produced any better results than just straight up freehanding.
Cut the pattern out and trace it again.
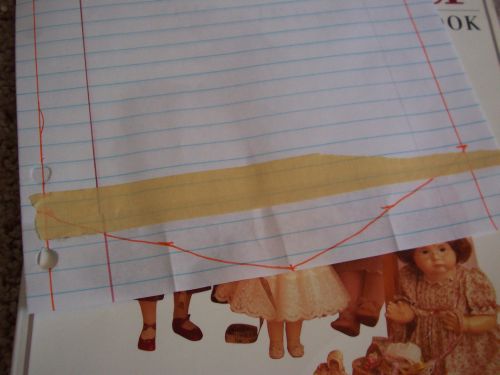
Decide which way you want your dress to wrap (it honestly doesn't matter, left or right is fine) and draw a line at least an inch and a half (and maybe two) inward from the seam on the side you picked.
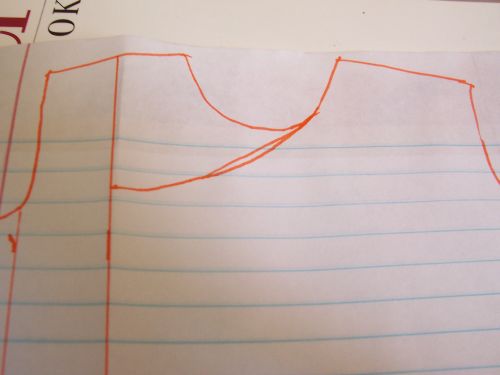
Draw a curve from the opposite shoulder to your new line. Cut this pattern out, cutting on your new curve and your new line.
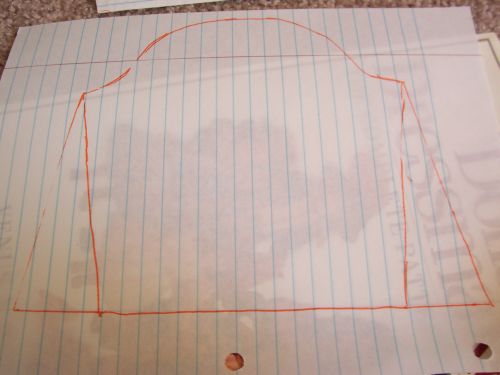
Qipao can have either long sleeves, short sleeves, or something in between. If you're making a qipao with longer sleeves, they need to be bell sleeves. Take a regular sleeve pattern and extend the wrist edge out an inch on either side, then connect the wrist edge to the bottom underside of the sleeve. It will look like a trapezoid with a curvy top. Cut it out.
Cut the following out of both lining and brocade:
One back (use the first pattern we made)
One over wrap front (use the second pattern we made)
Two sleeves
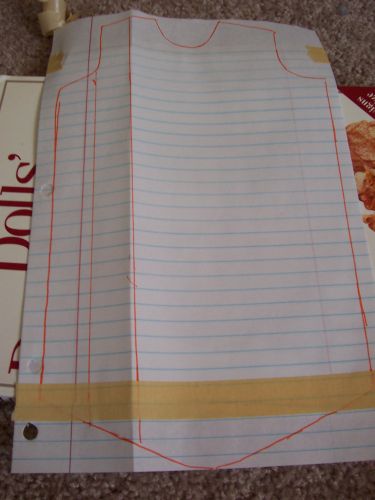
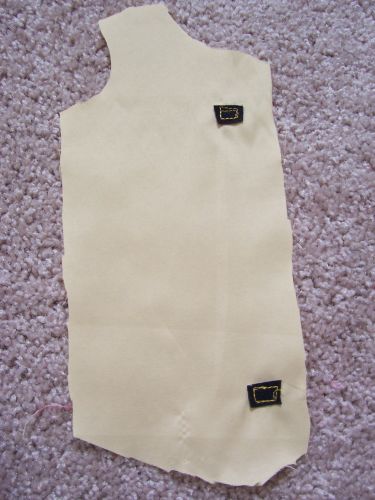
One under wrap front (see picture below -- what you'll do is fold the first
pattern we made in half, then extend by an inch)
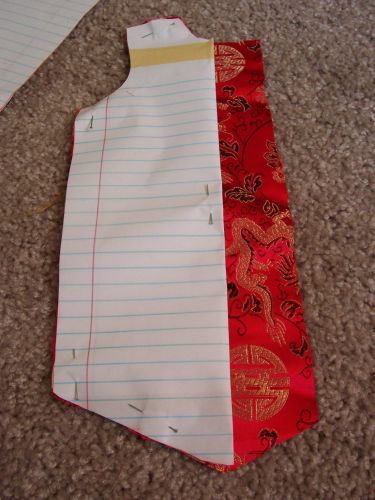
This is how to cut the under wrap front. Fold the back pattern in half, then when you cut, extend the pattern out about an inch.
Now, SKIP THESE NEXT FEW STEPS IF YOU'RE NOT DOING THE TRIM.
What you need to do is cut some edging for the pieces. I'll provide pictures at the end of this, so if you're confused right now, just hang on and read all the way through. If you need more help then the pictures on this page offer, try scrolling to the top and clicking on the 'What is a qipao?' link for more pictures.
You need to edge the bottom edge and the neck edge of the back, the bottom edge and the neck edge of the under wrap front, the entire side edge of the over wrap front, and the wrist edge of both the sleeves. Like I said, pictures coming. Unfortunately, there's no easy or good way to do this. You can either spend the rest of your life trying to cut patterns from the patterns we made earlier, or do what I did and use a creative mix of your original patterns and free handing. If your cloth doesn't spot when you get it wet, you could use a fabric marker ... but since we're dealing with fancier cloth, it probably WILL spot. Test it first.
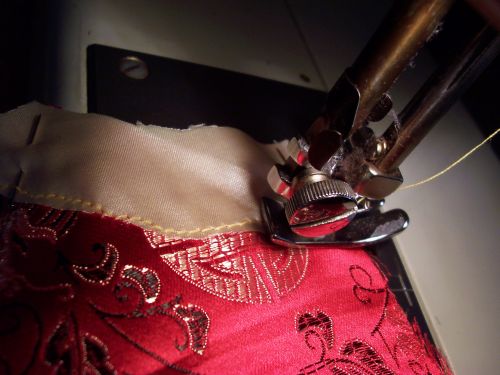
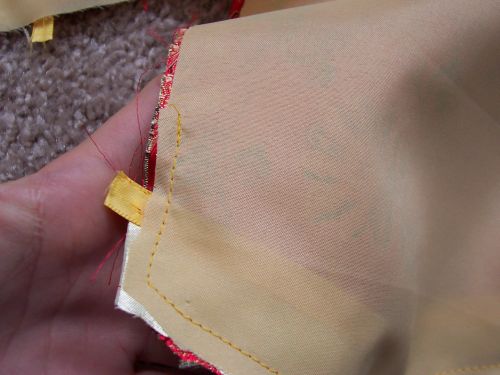
Top stitch the trim to the brocade on the edge furthest from the edge of the brocade. Yes, I know we're leaving a huge raw edge. We're gonna cover it up like so:
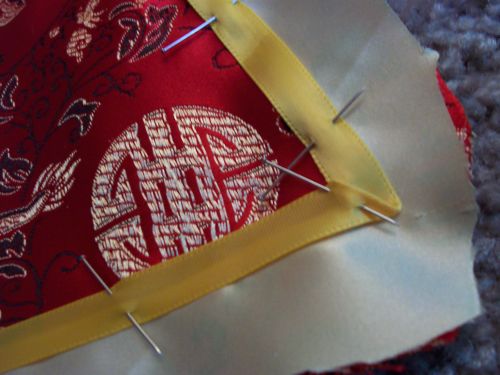
Pin ribbon over the topstitching you just did. You might need to fold the ribbon like in the picture to do corners. Make sure your top stitching and your raw edge are covered completely! Stitch down both edges of ribbon. If you're using rick rack, sew it on now.
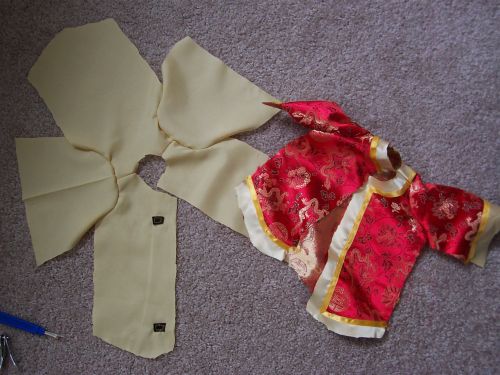
For your reference, you should come out with stuff that looks similar to:

The sleeves
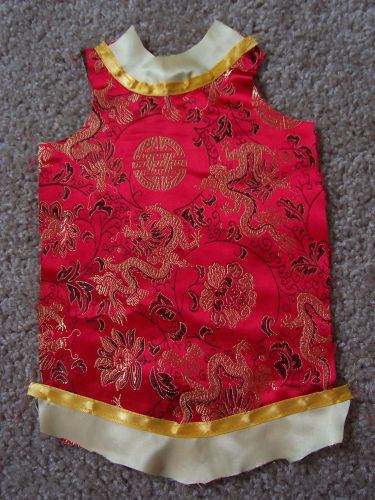
The back
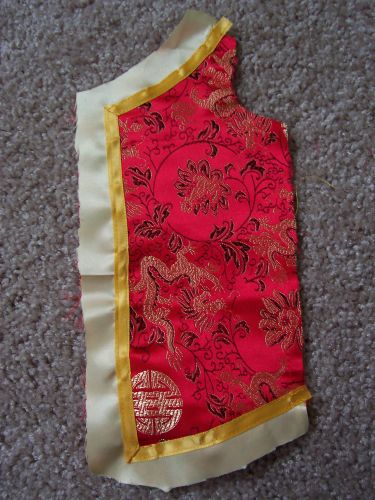
The over wrap front. Notice the funky trim shape. Yes, oh yes, this is hard to cut.
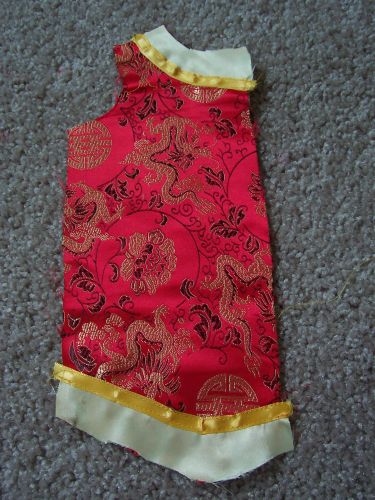
The under wrap front.
Now, everyone please rejoin us. Before we go on, find your lining piece for your wrap around front and sew a bit of velcro to it, about an inch and a half away from the edge. I did two small squares of velcro, but really, you could do a strip, or whatever you wanted. Find some way to sew a complex velcro dragon for all I care.
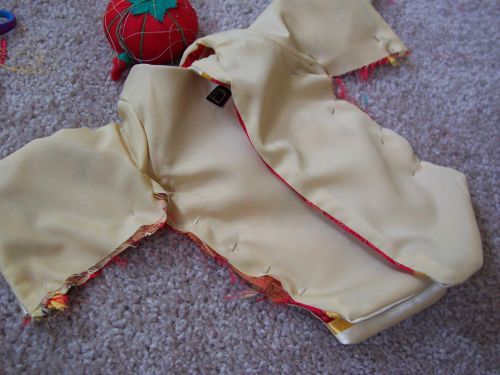
Sew your shoulder seams together on both your lining and your brocade, then sew the arms in. You should have two vague qipao shaped objects at this point.
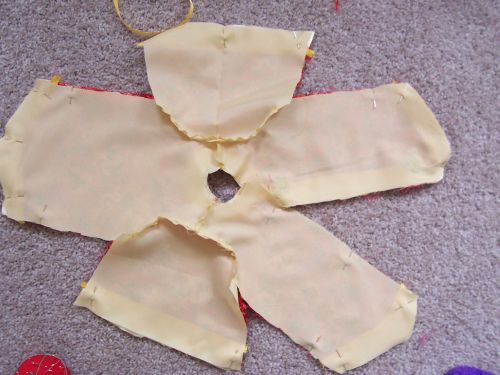
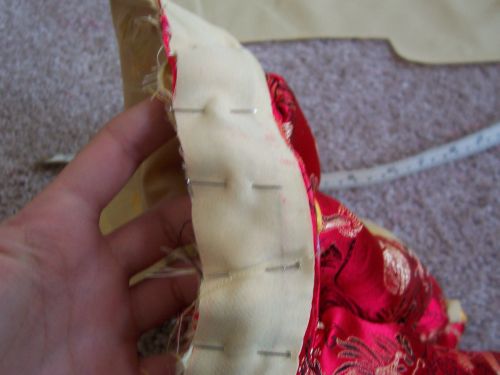
Pin it together, right sides facing each other, just like you were lining a coat.
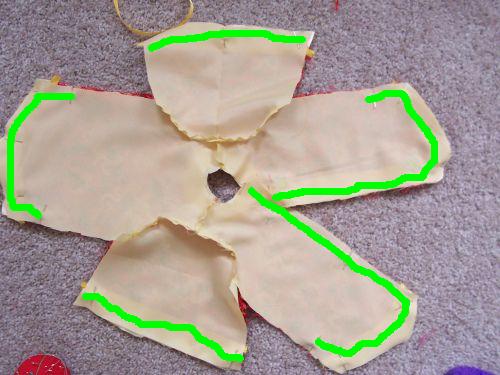
Follow close. You should ONLY sew the parts I marked in big nasty green. You can kind of tell where I was planning to sew any way by the pins.
By the way, notice we sewed up just a little past the curved part? That will help us make the slit in the side later.
Turn it inside out and press it press it press it press it. It won't want to lay flat, but make it.
To make the collar: cut a rectangle about 8 inches by 1.5 inches out of brocade and lining. With the rectangles sitting longways, locate and round off the top two corners. With right sides together, stitch from the bottom corner to a rounded corner, to the other rounded corner, then back down to the last corner. Turn, press.
Pin the collar to the qipao like you would a regular band collar, sew it in, and press the grand hell out of it.
Pin the front to the back, and the sleeve edges together. Sew down the sleeves, then down the side. STOP at the side seam that's already been sewn up at the curve. That makes our split!
On the under wrap front, sew some velcro to match up with the velcro that we put on the lining. Yes, the frogs will hold the outfit closed, but we're gonna cheat and use some velcro to help.
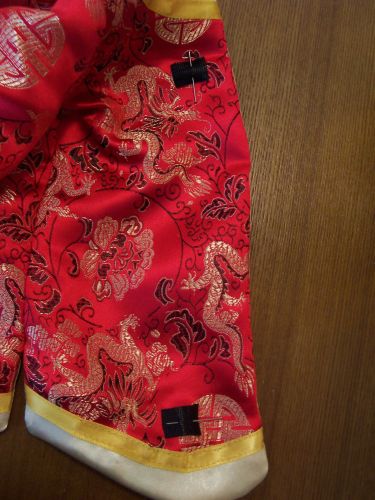
Now, you could buy your own frogs, but most are either too big for dolls or way expensive. I recommend making your own. I used the directions from this site, but I changed the cord length to 5 inches and 8 inches (for doll sized frogs), and I used hot glue instead of craft glue (holds way better). You'll probably only need to make four or so, maybe less if you made a really short one.
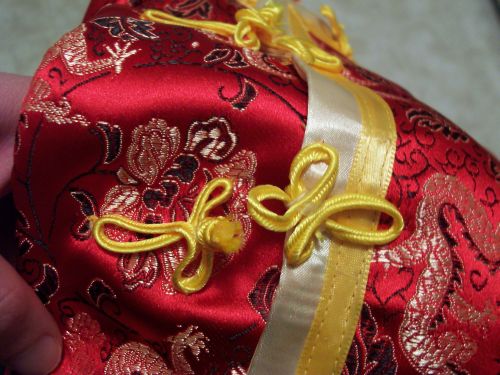
Measure and mark where the frogs go, then sew the frogs on. I recommend tacking them on with the ittiest bittiest stitches you can muster. Make sure you have the frog pieces hang off the overlap edge so they can reach each other and fasten!
There you go! Enjoy your new qipao!
To see finished pictures of this project, click here to go to the Sewing Table.